Part0 - Humble beginnings
Welcome! Here I hope to document a bit of my adventure of disassembling the GameBoy game Final Fantasy Adventure, called FFA from now on, as I don’t want to type that out all the time.
FFA is also called “Mystic Quest” in europe. I used the US version to base this disassembly on.
Why?
Why FFA? It’s a fun game. It isn’t Links awakening level of great. But it’s still a good game. I’ve made LADXR The links awakening randomizer, for which I could tell many stories. But that isn’t this story.
This story is about FFA. And let’s get started…
The start…
Most disassemblies for the GameBoy start at mgbdis. Which turn a rom into assembly code. It does it’s job, and it’s a pretty simple script. However, I quickly found out that disassembling is an iterative process. You discover a bit more about how the ROM is working, and because of that, the disassembly will be wrong in areas…
Now, I am lazy. The good kind of lazy. I didn’t want to manually fix up some data into code after discovering that a specific block of data is actually code. Or the other way around…
Introducing… The disassembly process!
Instead of going around and doing a lot of manual fixing up after disassembling. I decided that I wanted the following process:
- Run the ROM in a specialized emulator, which marks parts of the ROM as code/data (more on this later)
- Process the output of that run into the disassembler and produce a disassembly
- Read the disassembly, finding parts that are not correct.
- Add an special marker, called an annotation, in the disassembly to mark that that part is something specific
- Re-run the disassembler with the previous generated disassembly and the annotations as input. To generate a new disassembly.
- Repeat from 3 until profit…
And that’s how the BadBoy emulator and disassembler where born.
The Emulator
The BadBoy emulator, it’s pretty bad as a GameBoy emulator goes. It’s not very accurate, it can play most games, but not the tricky ones to emulate. Sound emulation is pretty bad as well. But, it does have a unique feature. It doesn’t just track if parts of the ROM are used as data or code (other emulators can do this as well). It keep track of how parts of the rom are used. If a piece of ROM is copied to VRAM, it knows that that part of the ROM is graphics or tilemap. If data is used as a pointer, it is marked as a pointer. It makes more detailed information then just plain code vs data.
The disassembler
This is where the fun starts, it’s also where a lot of complexities are hidden. But the basics are:
- Ability to disassemble blocks of code.
- From blocks of code, trace jumps to other blocks of code.
- Support reading back in the disassembly to read annotations and labels.
- Also read back in where to split files into include files.
- Support custom annotations for custom data blocks.
- Almost no assumptions, if it doesn’t know, it doesn’t assume there is code. It just exports data.
If you read this disassembly, you’ll encounter ;@ style comments, these are the annotations. They exists for the disassembler to re-generate the same disassembly again.
During the project I actually completely rewrote the disassembler, that’s how important it is for the project.
The other emulator?…
While BadBoy was great to get some initial good data, it’s not great for anything else. While actually stepping trough the code and seeing what the code is doing live, I’m using BGB. One of the important features for me is that I can live edit the ROM. “What happens if I change this byte” can really assist in figuring out what things are doing.
More tools?….
One surprisingly useful small tool is a simple script that converts a whole rom into graphics. For FFA this image looks like:
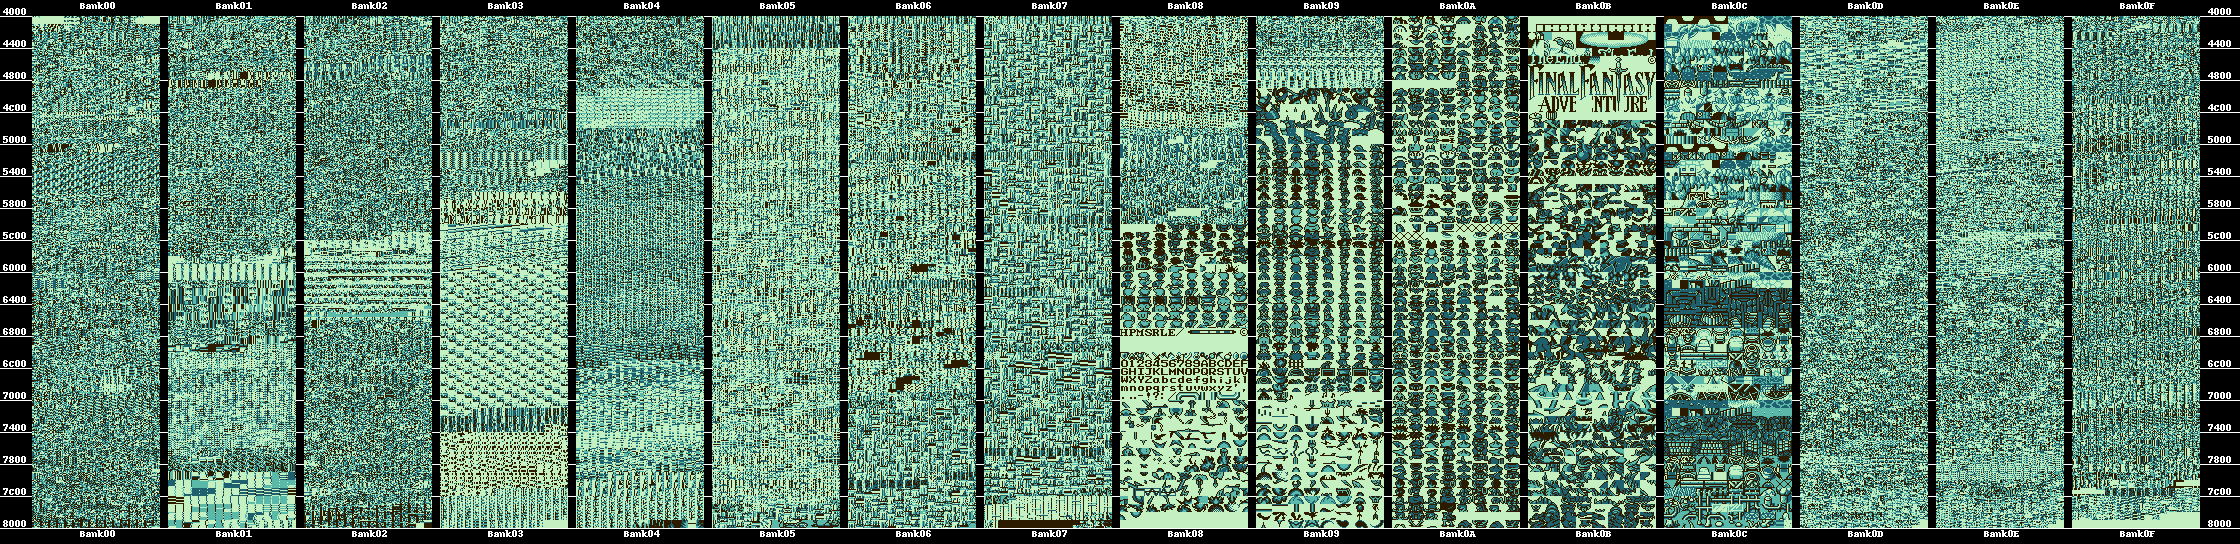 Some things are really easy to identify in this image. Graphics are obviously in bank 08 to 0C. Less obvious things are blocks of data. Code generally looks like just noise. But some other banks, like the 2nd half of Bank01 and most of Bank03 have some clear structure to it. It also shows the rom is very tightly packed.
Compare it with the image of LADX, which clearly contains sections of nothing. And also data clearly in specific banks.
Also, the following resources are pretty much required to have partially fixed in your mind:
- pandocs reference manual on anything gameboy hardware related. How rendering works, audio works, interrupts, anything.
- gbz80 instrution reference details on all the possible assembly instructions
- rgbds manual details on the assembly language I use
- opcode table table of all possible opcodes and which byte value belongs to them
Closing word
So, that’s it for main tools. Next up, starting the work…